Showing posts with label wire wrapped. Show all posts

Tuesday, October 4, 2016

Wire Whatchamacallits - Wire Wrapping

Trying to come up with some ideas that were mine, not from other people's ideas. Am I the first to think of these? Of course not! But most of these are my own designs, not from a tutorial. Or at least I put my own spin on them! This post is picture heavy, if you have a slow connection or data limits!

"Copper Kiss" with an AB Swarovski crystal.
The eye, below, is not hand painted, I purchased it, but I love the idea and will probably try making my own one day! What I thought was cool is how it follows you, no matter which way you tilt it..:D
Looking at "Eye Of The Tiger" from the left side.

"Eye Of The Tiger" viewed from the right!
And head on, after patina. Odd, right??
This set of photos is a little different. The Celtic design is NOT mine, I saw it on Pinterest. I love the intricacy of the design and decided to try it. After I showed it to my husband, he said that it was probably a Celtic cross...hadn't considered the idea! But I designed some earrings based on it, as well. I made two of them, one I patina'd, one I did not.
"Celtic Crossover"

This one is not patina'd but I made a fancy bail for it. The Viking Knit necklace is for another pendant I made, which I will picture below.
Here is the set, with earrings...but I added dangles to them after I took this photo.

After adding the dangle. I also made another with no patina and considering making it sit so it looks like a heart. With or without the dangle? Right side up or episdn uwop? ::D Let me know what you think!
This pendant is called "Autumn Winds", and is wrapped around one of my polymer clay Mokume Gane pendants that I made based on Marilyn's tutorial. It is reversible, and made of copper, with the Viking Knit chain from above.

Reverse side.
I'm still making resin items, too. This one contains real beach shells. These are the first bracelets I've made using the mold I bought at Michael's. Works great...you can even put the finished bracelet in the mold upside down with more resin to get rid of the ridge on the top if it's too deep. Or to fill in a bubble. :)

This one has a sort of luminescent glow. It's faux lace with a sort of neon yellow background.

Purple dried moss with gauzy ribbon flowers.
 Back to wire!
This is an adjustable quartz ring made with antiqued copper wire. These rings WERE done with a tutorial...more about it below.
Adjustable laboradorite ring with copper.
Adjustable Ruby Zoisite ring. Love this one!
The tutorial for these adjustable rings is on my Facebook group Wirewrap Tips and Tutorials. It's a little general in the instructions but I love how you can make it your own!
From a Youtube tutorial...just love her designs! (Link below)
This is another design by the same artist on Youtube. Her link is:Lan Anh Handmade. She has such unusual and original designs!
And last, but not least, here are my InSPIRALed Angel Wings. They are still a work in progress...haven't decided on how to connect them to the necklace. But I love that together, they resemble a heart...THIS design is mine....

After patina.

But ... the original idea I had was to use them to cover another design. I love that they look like a heart when closed...but what if I put something behind them? And then I remembered my "Celtic Crossover" pendant...

Peekaboo! Now it looks like a Celtic ANGEL...:)


Even more pronounced when you put the wings behind...:)

Let me know what you think! Thanks for visiting! Drop me a line on Facebook if you like what you see!

Tuesday, October 20, 2015

Tree Weaver - Wire Weaving

Hi again! Been working on pieces from Lisa Barth's book Timeless Wire Weaving lately. Love her work and so glad to learn how to do it! I was using wire that was a little too thick and they were coming out rather large...but it's okay, since I come from a family of giants. :) I am 5'8" but my one aunt is 6'4" and another is 6'9"!

The book calls for small square diagonally drilled turquoise beads...no luck on those! So I adapted...:)


 Side view of the bracelet above. This wire is 18g and probably 14g. The cool thing is the turquoise pieces spin! Great for fiddly people like me. :D


 The bracelet above was the same pattern but made with 20g wires. And additional turquoise! Spin, spin spin!


You can see the difference between the two above, just because of the wire size. I haven't decided whether to put a patina on these or not, I like them so much like they are!

''
The one above is also from Lisa's book, but I put one of my polymer clay mokume gane pendants in it. I wish I could take a good picture of these stones! That red color is actually a brilliant pinky/purple. :) With lots of sparkle! I love the color with the copper wire though...


This one is a dyed crackled agate with copper wire. It comes this color, I did not put a patina on it and it won't change or come off...My own design. 

Side of the dyed agate pendant. Just wanted to show that weave....I just love it, looks like knitting!

This is another bracelet from the book. I used a tiger eye donut I already had, just waiting for a design like this!
CSL Designs on Youtube has a tutorial for elven ears and I thought I'd give it a try. 

These are copper with Swarovski AB crystals. 


And then I got on a Tree of Life kick after I made one for one of my FB groups. I had seen one someone made with a crystal and decided to try a similar project. 

The one below is much smaller than the one above, which is more of a fan pull or window hanging than a pendant! The one below is nice, though, I wore it the other night and it doesn't scratch or anything. Kind of important when you have so many wire ends!

And finally, this is the one I entered in the FB contest on my group. Love how it came out although the swing is a little too delicate to wear this! Again, much larger than you would probably want to wear for a pendant, though that is just MY taste!


Thanks for looking and come back soon! Please give my  FB page a like!

Sunday, October 4, 2015

Good Copper & Braided Mokume Gane - Wire Weaving

Warning - This post contains a lot of photos! :) I recently got inspired to buy Lisa Barth's book on wire, called Timeless Wire Weaving: The Complete Course. I love it! I've made three or four projects from it already. They aren't perfect but I could not have made them without this book!

The bail on the stone is similar to one in the book. The bail on the VK chain is my own design

Closer view.  That is triple Viking Knit...I made the chain, as well (first picture).

I need to find a good source for turquoise, or make my own from polymer clay!
This bracelet was made with much larger wire than the book suggested. It is quite large...but I don't care, I love it! The square stones in it are some kind of agate, I think. They are green, which isn't coming out in the photos too well!

The beads on the side are glass Toho matte finish beads. They were the closest to turquoise I had!
I just love that weave at the back! I will be using it frequently! The large wire I used (the outer wire is some I stripped from electricians wire, I think it's about 16g! The inner base wire is some 18 I got at Home Depot.) made this huge but very striking!  I am going to try this one again in the right gauge next time! I think it will look much more delicate. I believe the wrapping wire was 24g.


This is the second bail I made from her book. Love that weave! :)


On this bracelet I decided to use the correct gauge after how large the other one came out! I love it...it is so delicate and lacy looking. I am so glad I bought her book!

Here's the both of them together so you can see the difference! Lol...

Last time I posted I promised pics of my last batch of Marilyn's MG technique after I put resin on them, so I thought I'd put them in this post as well, since I finally got them wire wrapped. I decided on a five wire braided wrap. I did not use the Magic Glos this time, I used Clearcast Resin and I have to say it is much cheaper and I am just as happy with the results!


The wire rose below I entered into a contest on Facebook. I didnt win but I still like it! It can be easily removed and put on another chain, as well. Yes, in this photo is the same Viking knit I posted up top. :D


The one below is unique in that I used a gold colored copper wire for the 5 strand braid and the Viking knit it is shown with. That Viking knit is different because it is double wire for a portion right in the center, where the pendant is. I got the idea for the clasp from the book by Lisa Barth, as well! And yes, again it is from my last Mokume Gane batch. :) Love the colors I got this time! Not sure where the purple went though....


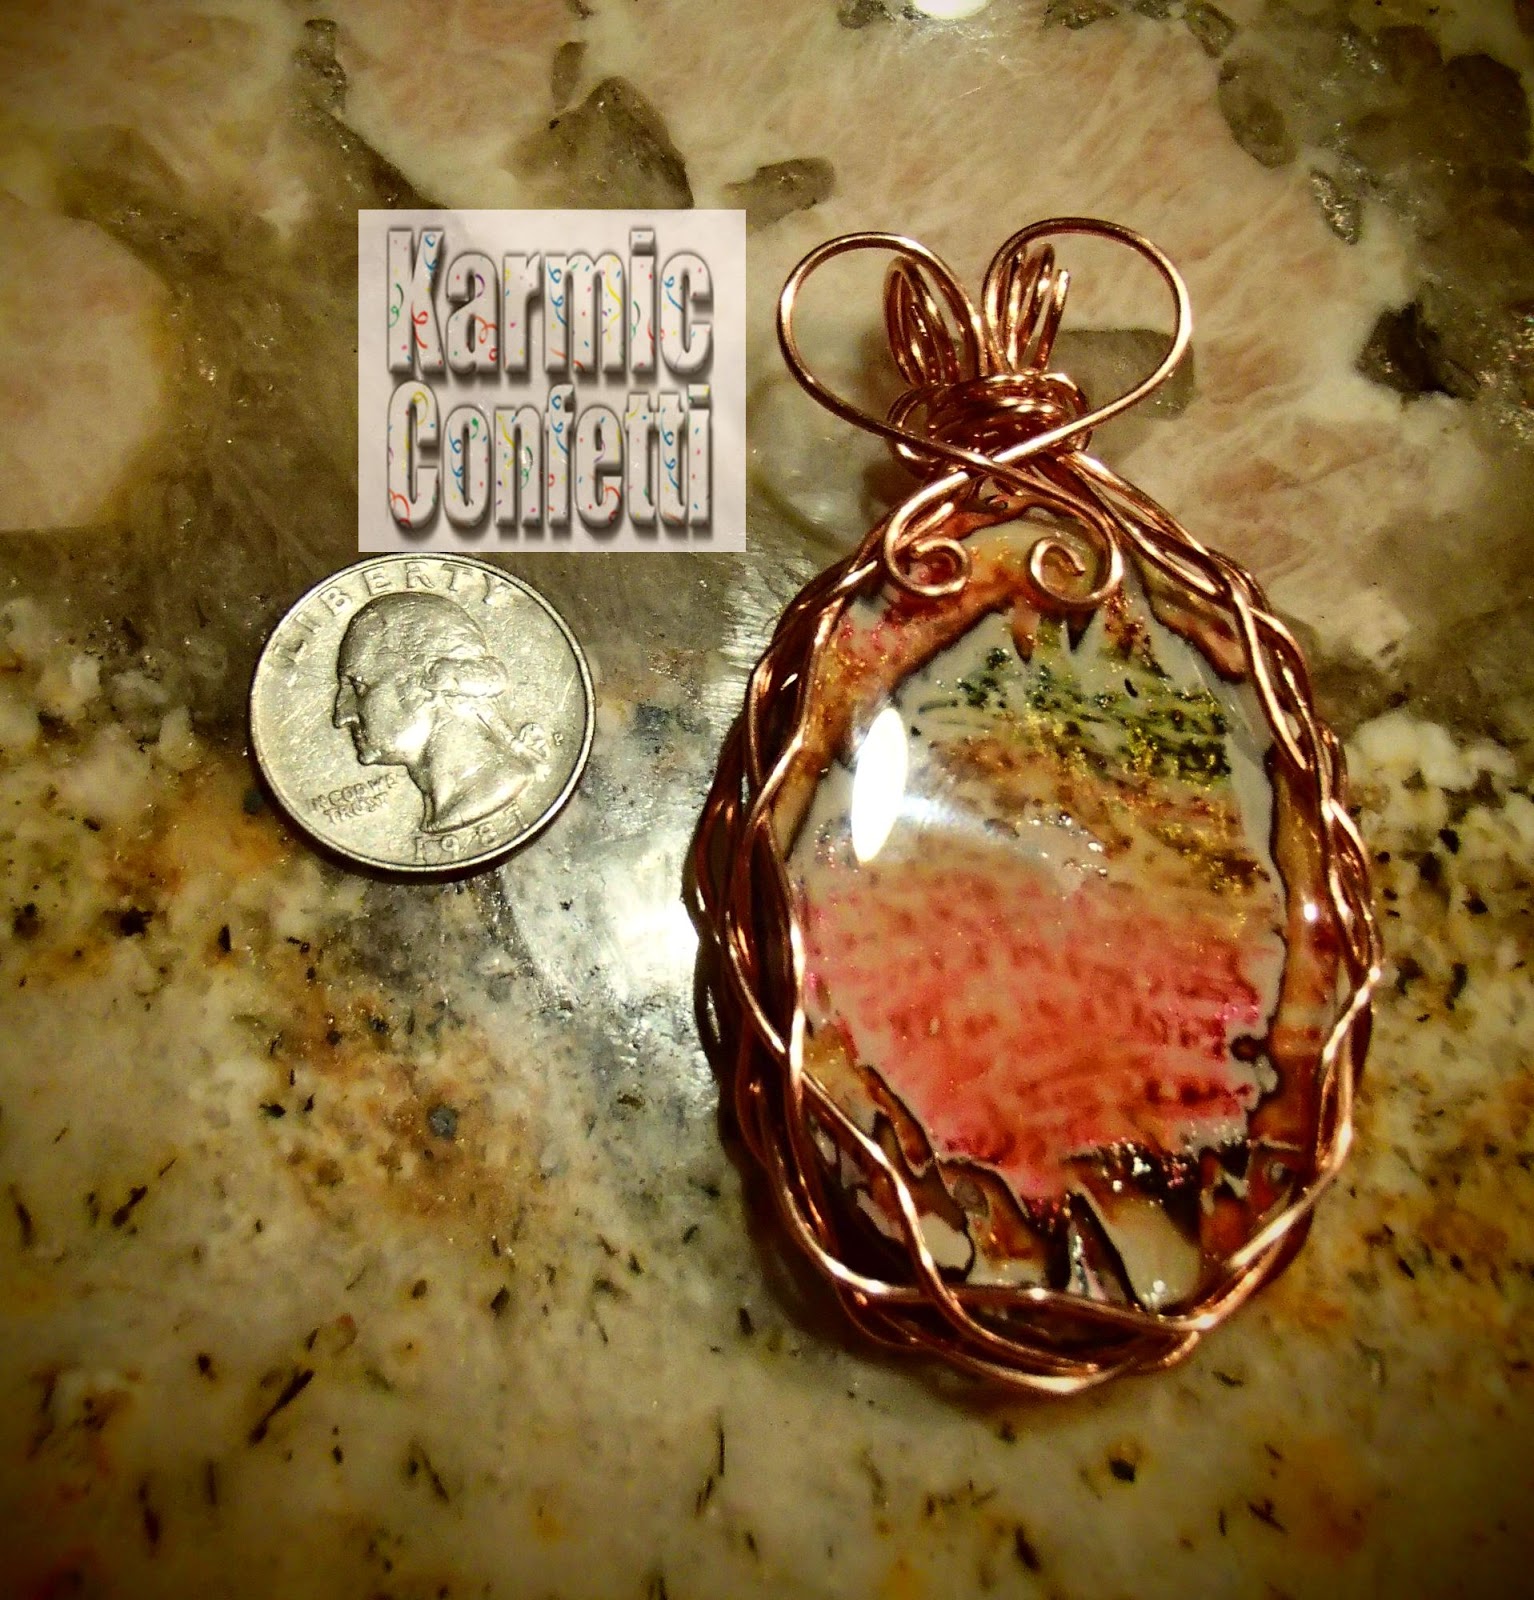
The last pendant is a little smaller than the rest. It is unique because I didn't really use a tutorial for it! A fellow group member on one of my Facebook groups told me how to do the zig zag weave and I had to try it! I really like how it came out. The stone is only a little over an inch so it is one of the smaller pendants I've made.

The other side...which might be the front? Hehe.
And this odd character is a polymer clay bead I made years ago and didn't quite know what to do with. It is a faux ivory piece. I saw someone on my Viking knit FB group make something similar and decided my egg would work! :D Maybe better around Easter? The wire I used is Parawire and came darkened like that....


Thanks for looking and come back soon! Make sure to like my FB page!